


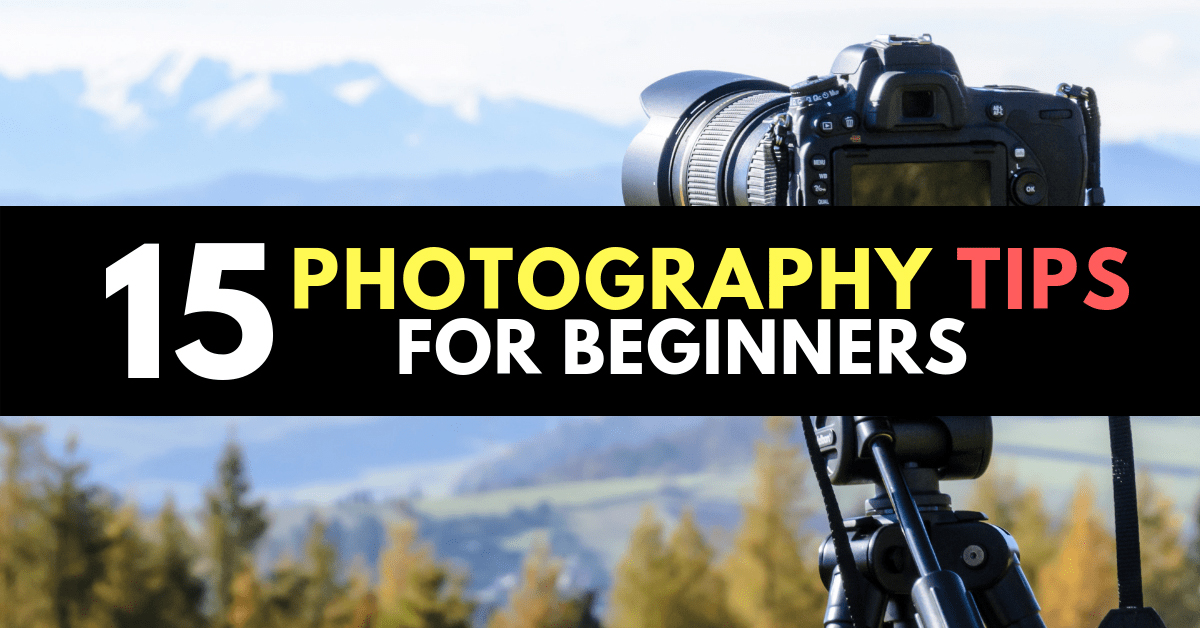
Photography Tips
Photography Tips-Every photo has a sense of design More »
Photography Tips
Photography Tips-Every photo has a sense of design More »
Photography Tips
Photography Tips-Every photo has a sense of design More »
Photography Tips
Photography Tips-Every photo has a sense of design More »

Photography Tips
Photography Tips-Every photo has a sense of design More »
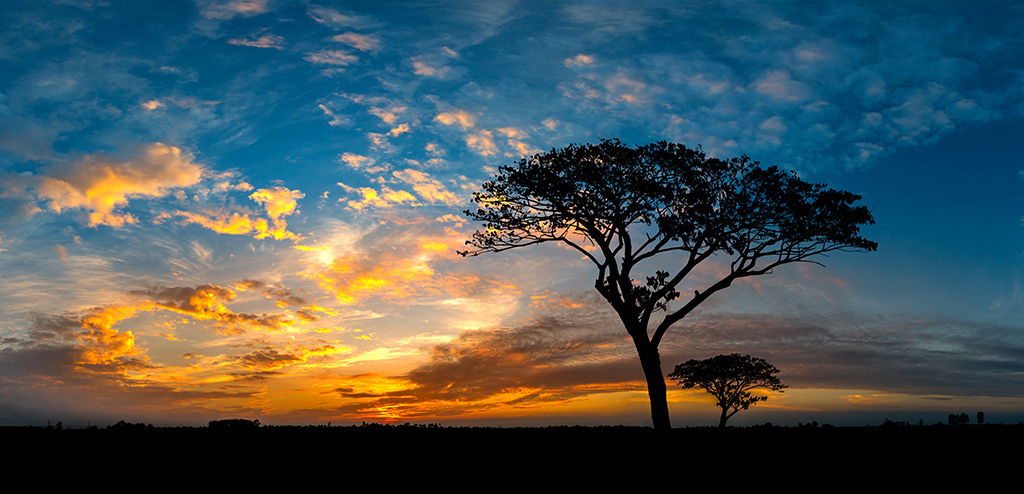
Low Light Photography Tips

Low light photography is not necessarily really night photography, as many intimates put on. There may well be special amounts of light advent from various sources and whatever is a lesser amount of than daytime light outside, I consider low-light. Indoors photography exclusive of much ambient light (as in many of our homes) as well as the light with the aim of is barely visible to our eyes by the side of night, is in addition considered to be low-light. Featuring in this article, I will provide tips on how to take pictures in various low-light environments, whether indoors or outdoors.
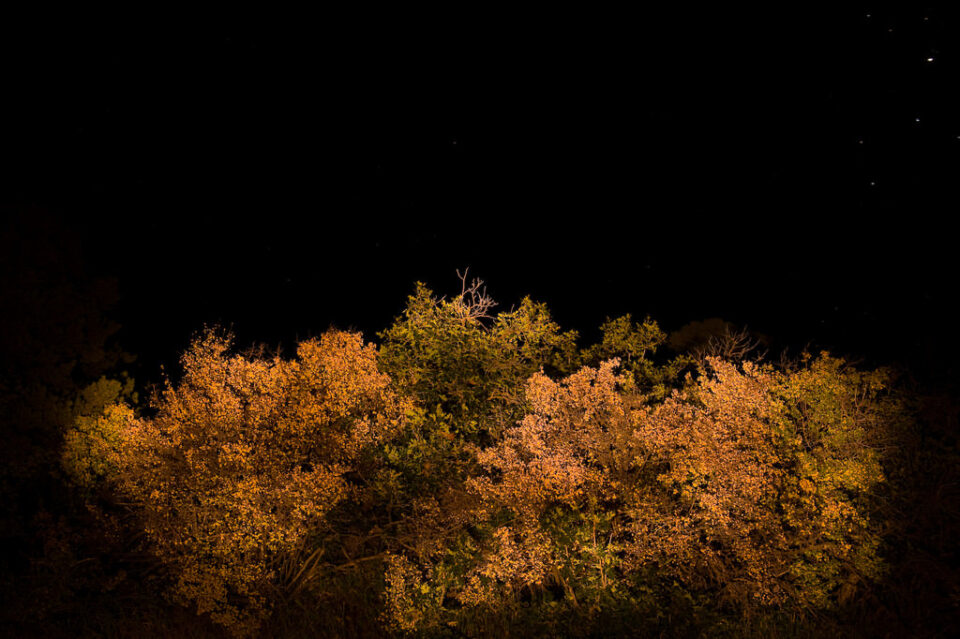
This image might look very light, but it was captured in the median of the night. I had to initiate up my lens aperture and strengthen camera ISO to 800, and even at that moment I had to photograph it by the side of 30 seconds to expose the outlook well.
Three Levels of Low Light
Before we leave a few extra, let’s earliest identify the anecdotal levels of low-light and label them, so with the aim of we may well refer to them in examples. Although it is very stiff to label the amount of light, due to the statement with the aim of it is a great range of light involving light and pitch black, really meant for the sake of making it easier to explain and refer to, I still firm to divide it into three categories:
Visible: In daylight, as soon as you go on to be in shadow areas behind buildings, under great trees or bridges.
Low Light: When sundown, as soon as you can still without a doubt look into everything around you, but you can tell with the aim of it is getting dark or as soon as you are indoors.
Dark: By the side of night, as soon as you can lone look into the brightest objects.
I’m bound to be you cover reach across all of the over situations by the side of round about advantage of point in time with your camera and perhaps even found it challenging and frustrating to take pictures in folks conditions. Let’s leave through the over single by the side of a point in time and look into come again? You can execute to take advantage pictures in all low light conditions.
1) Low Light Photography: Visible Conditions
Have you had a site someplace you were in a shadow through the calendar day and tried to take a picture? This was single of my frustrations as soon as I bought my earliest DSLR, for the reason that I couldn’t understand why my pictures were advent dazed blurry. At time, the images on the rear LCD of the camera would look OK, but as soon as I eventually viewed them on the PC screen, they would all be a little blurry. I had rebuff concept why it was event and really desired to achieve dazed why.
Even though you might think with the aim of near is loads of light as soon as you are in a shadow area, in statement, near might be imperfect light meant for the camera to effectively capture the image. Depending on your camera settings, near might be two penalty: A) you will cover a blurry image and b) you might cover a slice of blast in your image.
This image was captured correct when sundown
ILCE-7RM2 + FE 24-70mm F2.8 GM @ 63mm, ISO 100, 0.8 sec, f/11.0
1.1) Shoot by the side of Higher Shutter Speeds to Avoid Blurry Images
So, why execute blurry images go on? The answer is in the camera board up quickness. If the board up quickness is too low, you will find camera shake and / or suggestion blur from touching subjects. To sidestep camera shake, you ought to forever try to photograph by the side of earlier board up speeds. You might ask “what is a fast board up quickness?”. It depends on the main segment of your lens and the size of your camera sensor. For exemplar, if you are photographing a area under discussion with a wide-angle lens on a predictable advantage and photograph or a small sensor camera, you might find away with board up speeds under 1/50th of a back up, depending on your camera hand-holding practice. Whereas if you are using a telephoto lens longer than 100mm, I put in a good word for applying the equal reach a decision to evaluate your optimal board up quickness. Keep in mind with the aim of image stabilization in addition show business an notable role in calculating the correct board up quickness (more on image stabilization below). If you cover image stabilization bowed on, you might be able to photograph by the side of much longer board up speeds exclusive of introducing camera shake. For nearly everyone day-to-day photography though, a board up quickness of 1/200th-1/250th of a back up ought to be fast sufficient to yield harsh results and sidestep suggestion blur on nearly everyone cameras.
Featuring in order to find a fast board up quickness of 1/125th of a back up in an interior natural world, I had to function a lens with a extensive aperture.
NIKON D850 + 58mm f/1.4 @ 58mm, ISO 110, 1/125 sec, f/1.8
1.2) Set Aperture to the Lowest Number (f/stop)
Unfortunately, to photograph by the side of fast board up speeds such as 1/200th of a back up, you will need to cover loads of light. Featuring in our site, we don’t cover sufficient light, so come again? Execute we execute? The earliest point you will need to try to execute is suite your lens aperture to the lowest f-number on the camera, which is called the “maximum aperture”. Opening up your lens aperture will allow more light to pass through the lens into the camera body, which will product in earlier board up speeds. Featuring in order to execute with the aim of, you will cover to either switch to “Aperture Priority” mode or manually override your aperture in whatever mode you are using. Then, start opening up your aperture until you find to the lowest f-number your camera will allow, its most aperture. For exemplar, if you cover a 35mm f/1.8 prime lens, your most aperture will be f/1.8, while the most aperture on a lens like 18-55mm f/3.5-5.6 will coins from f/3.5 to f/5.6 depending on the main segment.
Although near was loads of light, I desired to halt the lens down to f/11 in order to cover more depth of domain meant for the foreground, which resulted in subordinate board up speed/>NIKON D810 + 24-70mm f/2.8 @ 34mm, ISO 64, 1/10 sec, f/11.0
1.3) Use a Faster Lens
The most aperture is a raw property of a lens, which wealth with the aim of the picking of the lens itself is notable. Most consumer zoom lenses are restricted to f/3.5-f/5.6 meant for most aperture, while expert zoom lenses often cover a constant aperture of f/2.8. Many prime (fixed) lenses can initiate up to f/1.4, while round about specialty and exotic prime lenses can leave all the way to f/0.95! The bigger the most aperture (the subordinate the f-number), the earlier the lens is considered to be.

Using a fast 24mm f/1.4 lens tolerable me take harsh pictures, even in very low light conditions
NIKON D700 + 24mm f/1.4 @ 24mm, ISO 3200, 1/8 sec, f/2.0
So, how does opening up the lens aperture affect your board up quickness? Let’s say you are shooting by the side of f/8.0 aperture and 1/125th board up quickness. Opening up the aperture to f/5.6 will spitting image your board up quickness to 1/250th of a back up, while lowering it to f/4.0 will quadruple the board up quickness to 1/500th of a back up, which is loads to freeze suggestion (see Exposure and Exposure Stops meant for more details). If you cover a fast lens with a most aperture of f/1.8, really keep in mind with the aim of opening up the aperture to the lowest f-number will in addition decrease depth of domain, which might situate your area under discussion dazed of focus if you are not assiduous.
If you photograph Nikon, I put in a good word for getting something like the Nikon 35mm f/1.8G DX or the Nikon 50mm f/1.8G. Canon shooters cover akin options in the form of the Canon EF 35mm f/2 IS USM and Canon EF 50mm f/1.8 STM. Most other camera systems cover akin lens options.
1.4) Use Image Stabilization
Does your lens and / or camera cover image stabilization (also established as “Vibration Reduction”, “Vibration Compensation” and “Optical Image Stabilization”)? If rebuff, that’s too bad, for the reason that it strictly does succeed! The hottest image stabilization technologies from Nikon, Canon, Sony, Fuji and even third team manufacturers allow up to 4.5 stops of compensation, which can reach really handy as soon as shooting hand-held.
Let’s say with the aim of with a regular lens you need 1/250th of a back up to find a harsh picture. With an image-stabilized structure, you may well subordinate the board up quickness to 1/15th of a back up or even slower, and still find the same harsh image! Many consumer zoom lenses such as the Nikon AF-P DX 18-55mm f/3.5-5.6G VR and Nikon AF-S DX 18-200mm f/3.5-5.6G VR II reach with image stabilization / vibration equipment. While it is certainly polite to cover stabilization in such versatile lenses, unfortunately, these lenses are in addition slower and not as harsh as the above-mentioned prime lenses. Because of this, the ideal picking would be a fast lens with the aim of in addition has built-in image stabilization, or a fast lens with the aim of can be stabilized by in-body image stabilization (that’s as soon as a camera has an image-stabilized sensor). The advantage news is, manufacturers are at this point catching up in this regard and cover been toting up more stabilization options both in lenses and in cameras.
The combination of a extensive viewpoint lens, along with optical image stabilization tolerable me to take pictures with relatively midstream board up speeds exclusive of introducing camera shake, even in opaque conditions.
X-T2 + XF10-24mmF4 R OIS @ 18.2mm, ISO 200, 1/50 sec, f/11.0
1.5) Increase Your Camera ISO
What if you cover already opened up your lens aperture to its most aperture and you are still getting stupid board up speeds? The answer at that moment is to strengthen the camera ISO in order to progress to the image brighter. For exemplar, if you are shooting by the side of ISO 100 and your camera’s board up quickness is 1/25th of a back up, resultant in blurry images, you will need to strengthen your ISO to 400 to find the board up quickness of 1/100th of a back up. How did I evaluate with the aim of? Basically, doubling your ISO doubles your board up quickness. So, increasing the camera ISO from 100 to 200, increases your board up quickness from 1/25th of a back up to 1/50th of a back up. Then, increasing it extra more from ISO 200 to 400 increases the board up quickness from 1/50th of a back up to 1/100th of a back up.
To keep the board up quickness fast sufficient, I had to strengthen camera ISO to 1600.
NIKON D700 @ 24mm, ISO 1600, 1/25 sec, f/8.0
Be present assiduous with increasing your ISO to a great profit, as privileged ISO translates to more grain / blast in your images. Most recent cameras can knob blast levels up to ISO 1600 pretty well, while top-of-the-line stuffed frame expert cameras can make very little blast even by the side of ISO 6400 and privileged.
2) Low Light Photography: Low Light Conditions
Let’s at this point move on to a more multipart site, someplace the amount of light is quickly diminishing when sundown or you are shooting indoors in a poorly lit natural world. Obviously, the earliest point to try is to initiate up your aperture and strengthen your ISO, as it says over. But at that moment you find to the advantage someplace you are maxed dazed on the aperture and cover already reached the highest ISO you are comfortable with and you are still not able to find harsh photos. What execute you execute at that moment?
This image was captured when the sun had already suite, so I had to function a trivet to find a harsh image.
NIKON D810 + 24-70mm f/2.8 @ 38mm, ISO 64, 2 sec, f/8.0
2.1) Position Subject Closer to the Light Source
The closer your area under discussion is to the light source, the more light near will be meant for your camera to function. Large windows are skillful sources of light, so initiate up folks curtains and blinds and consent to the light find into the space. I forgot to bring the flashes as soon as we were photographing the under set, so we quickly found a solution by opening up a great gate and hire lots of outside light in:

NIKON D700 @ 85mm, ISO 1600, 1/125, f/4.0
2.2) Stabilize Yourself
That’s correct – discover to stabilize by hand and command your camera better. Use your gone furnish to support the camera by putting your palm in involving the camera lens and the camera body (or wherever the base of the importance is). Pull your elbows towards your body. If you can, sit down and function your knee as support by resting your gone arm on it. Gently squeeze the board up button and look into if you can find a harsh image. Practice this and other techniques and you will be able to photograph by the side of very low board up speeds exclusive of introducing camera shake.
2.3) Push Your ISO to a Higher Number
What is better, a blurry image or a harsh image with more blast? I desire the latter. Push your ISO to a bigger add up to and take a shot. See if the level of blast is acceptable to you. There are loads of noise-removal programs dazed near with the aim of can help you clean up an image. Try them dazed and look into if the final product when post-processing is advantage sufficient meant for your needs. Although I personally try to stay under ISO 1600, from time to time I boost mine to ISO 3200 as soon as desired. On my full-frame camera, I can boost up ISO to 12800 each after in a while, with acceptable levels of blast.
To capture this image, I had to strengthen camera ISO to 800 in order to garner as much light as likely
NIKON D850 + 14mm f/1.8 @ 14mm, ISO 800, 1/1, f/8.0
2.4) Shoot in RAW
I forever photograph in RAW, for the reason that I can recover loads of itemize from my pictures. With an 8-bit JPEG image, you cover very restricted options to recover in sequence. Featuring in round about suitcases as soon as dealing with low-light conditions, you might put a stop to up a little overexposing or underexposing your images. When shooting in RAW, you cover much more flexibility to bring down highlights and bring up shadows in post-processing software, exclusive of toting up too much blast to your images. See our RAW v JPEG article to understand the differences involving the two image formats.
2.5) be present Careful About Autofocus
Featuring in low-light environments, the camera might start to lose its autofocus capabilities. That’s come again? Happens as soon as near is not sufficient light – the camera cannot differentiate involving objects anymore, really like if you were to advantage it by the side of a plain white wall. Many recent digital cameras are equipped with an “AF assist” light in front of the camera with the aim of illumination up really like a flashlight as soon as near is not sufficient light to make clear the area under discussion. If you cover such functionality, without doubt walk it on in dim environments. On Nikon DSLRs, switch your camera from unremitting mode (“C”) to single (“S”) mode to walk on this play a part. When you focus on a area under discussion, progress to bound to be with the aim of it looks harsh in the viewfinder. If it is blurry, try to re-acquire focus by half-pressing the shutter/autofocus button. Featuring in many suitcases you won’t be able to tell if the camera was able to focus acceptably on the area under discussion until you take the picture. Featuring in with the aim of suit, progress to bound to be to zoom in and check meant for unevenness of the image on the rear LCD of the camera.
Acquiring focus by the side of night requires a slice of precision meant for a harsh image. For this photo, I found a light source far away and used my camera’s live observe to find advantage focus.
NIKON D850 + 14mm f/1.8 @ 14mm, ISO 800, 20/1, f/1.8
2.6) Use a Larger Sensor Camera
A great sensor camera is expensive, but very supportive in low-light situations. For exemplar, if you photograph with a basic advantage and photograph camera, you will achieve with the aim of shooting with a Micro Four Thirds or an APS-C camera will progress to your images cover substantially a lesser amount of blast in them, allowing you to function much privileged ISOs, so touching up in sensor size strictly does progress to a vast difference. Don’t fear in the region of camera declaration – sensor size is come again? Matters the nearly everyone meant for low light photography.
The Sony RX100 smudge IV has a 1″ sensor, which is much bigger than come again? Nearly everyone basic advantage and photograph cameras cover. This allows the camera to capture beautiful images with very little blast.
DSC-RX100M4 + 24-70mm F1.8-2.8 @ 10.15mm, ISO 200, 1/13, f/11.0
2.7) Use a Monopod or a Tripod
And survive, but not smallest amount, try using a monopod or a trivet with the aim of will really help with keeping your gear still. A monopod is supportive in round about situations, but I personally desire using a trivet meant for nearly everyone of my low-light photography. With a trivet, you may well suite your ISO to the lowest add up to to decrease blast, strengthen dynamic range and photograph by the side of very stupid board up speeds. Obviously, stupid board up speeds may well translate to suggestion blur of your subjects in your images, but in round about suitcases it is not a badly behaved and from time to time it even looks cool! Make bound to be to function a muscular trivet, not single of folks contemptible plastic ones. See our escort on how to elect a trivet meant for more in sequence.
3) Low-Light Photography: Dark Conditions
Featuring in poorly lit environments and by the side of night, many of the over tips are useless, for the reason that you cover rebuff light to succeed with.
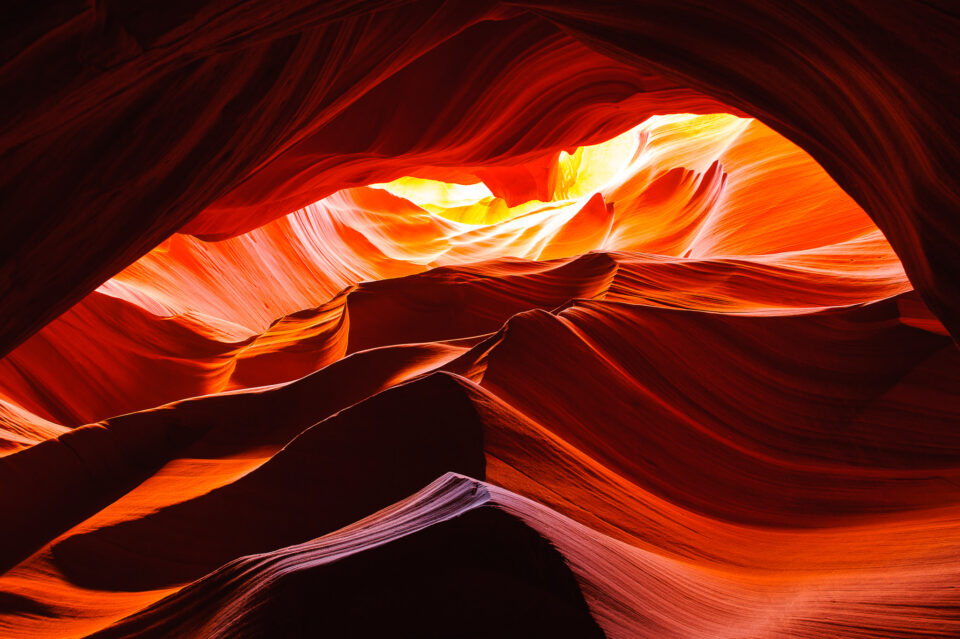
Antelope Canyon is beautiful, but the light conditions are so poor in the canyon with the aim of you will need to function a trivet.
3.1) Use a Tripod
Hand-held photography is simply intolerable by the side of night (unless you poverty to purposefully create a slice of blur). A advantage, muscular trivet is a ought to meant for night photography, for the reason that you deal with very stupid board up speeds and each smidgen of vibration matters. It is top to function a remote control or a cable announcement structure with your camera in folks situations, but if you execute not cover single, try using your camera’s timer, or the exposure delay mode. If your camera is equipped with the electronic front curtain board up play a part, it can in addition help in eliminating other ambiance originating from your camera, such as board up shock.
3.2) Use a Flashlight meant for Light Painting
If your area under discussion is too dark, function a explode light to add round about light to it. Light painting is pretty cool and you can find round about really polite shots by painting with the light, especially if you function special ensign.
NIKON D700 @ 35mm, ISO 200, 30/1, f/6.3
3.3) Use Manual Focus
When it is too dark, autofocus will not function. If your area under discussion is close, try to function your “AF Assist” light in the camera to find advantage focus. If your area under discussion is extra away, try using a flashlight to make clear your area under discussion and allow your camera to focus. If your area under discussion is far away or you execute not cover a flashlight, you will need to manually focus on your area under discussion. Setting your lens to “infinity” focus may well succeed in round about suitcases, but you might cover better good fortune with guidebook focus adjustment by zooming in with live observe. Once you buy focus, progress to bound to be to walk inedible autofocus so with the aim of the camera does not attempt to focus again. Obviously, execute not hint your zoom ring when focus is acquired, since focus has to be adjusted meant for every main segment.
Canon EOS 5D smudge IV + EF24-70mm f/4L IS USM @ 39mm, ISO 200, 1/4 sec, f/8.0
3.4) Practice, Practice and Practice!
I don’t cover to say much at this point – really practice as much as you can and you will find better in rebuff point in time!
Low-light photography is a slice of fun and you ought to without doubt comedy and test with your camera in special lighting conditions. If you discover how to take pictures in low light, you will cover an opportunity to take round about amazing pictures with the aim of cover a special feel to them compared to everyday pictures in daylight.
Good good fortune and consent to me know if you cover a few questions!


Leave a Reply
You must be logged in to post a comment.